
Silky Steamed Egg Custard Recipe (滑嫩蒸蛋)
-

RATINGS
Not rated yet
-

COOK TIME
Prep 5m • Cook 20m
-

VIEWS
1,235
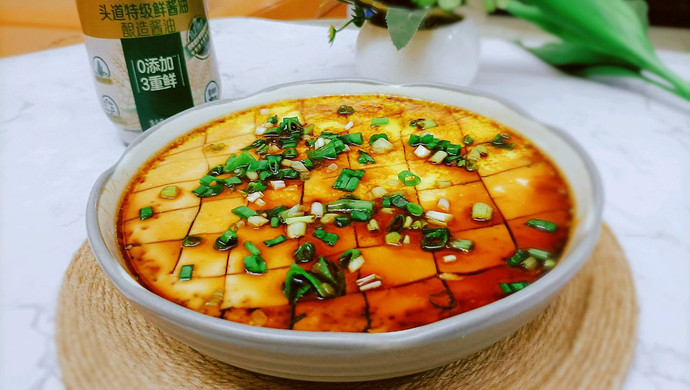
I keep coming back to this dish because it’s the kind of thing that works even when I’m half-asleep in the kitchen. The first time I got it right, I was surprised by how quiet it felt—no sizzle, no smoke, just a bowl sitting in steam while I washed up or checked my phone. When I lifted the lid, the surface was smooth like a pond after rain, not a single bubble. The spoon sank in with almost no resistance, and the first bite tasted clean, mild, with just enough salt to make the egg flavor come forward. It’s not rich, but it’s deeply soothing—like food that doesn’t ask anything of you except to sit down and eat. I’ve served it with plain rice on weeknights, and once, on a whim, next to buttered toast for a friend who’d never had it before. She ate the whole bowl without saying much, then asked for the recipe.

Ingredients
-
3 large eggs
about 150 g total weight without shells
-
225 g warm water
or low-sodium chicken/vegetable broth (about ¾ cup + 2 tsp)
-
1 g fine sea salt
about ¼ tsp
-
½ tsp neutral cooking oil
e.g., canola or grapeseed), for the egg mixture
-
¼ tsp toasted sesame oil
-
1 tbsp finely chopped green onion (optional)

Instructions
-
Step 1: Whisk eggs gently but thoroughly until uniform
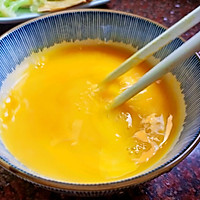
Crack the eggs into a heatproof bowl that fits inside your steamer. Add salt and ½ tsp cooking oil. Whisk with chopsticks or a fork in one direction for about 60 seconds—just until the yolks and whites are fully blended and the mixture looks slightly frothy but not bubbly.
-
Step 2: Add Water and Mix
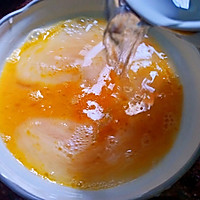
Slowly pour in the warm water or broth while continuing to whisk gently. Once combined, pour the mixture through a fine-mesh sieve into a clean bowl (or back into the same one). This removes any stringy bits and excess foam, which helps prevent holes in the final custard.
-
Step 3: Cover the bowl and place in a preheated steamer
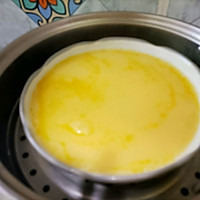
Bring 2–3 cm (1 inch) of water to a gentle boil in your steamer. While it heats, cover the bowl tightly with a heat-safe plate or parchment paper (avoid plastic wrap if possible). Place the covered bowl on the steamer rack. Once steam is steady, reduce heat to medium-low.
-
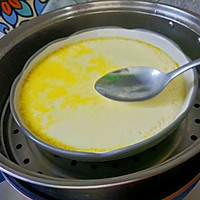
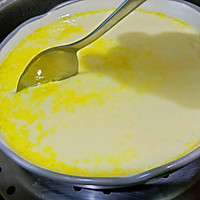
Step 4: Steam gently without peeking for 18–20 minutes
Steam undisturbed for 18–20 minutes. Don’t lift the lid early—the sudden drop in temperature can cause uneven setting. The custard is done when the center jiggles only slightly when you nudge the bowl, and a toothpick inserted comes out clean.
-
Step 5: Rest briefly, then season right before serving
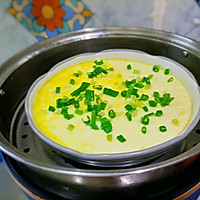
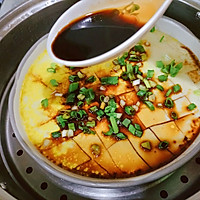
Turn off the heat and let the custard sit, covered, for 2–3 minutes. Then remove the cover, cut shallow squares with a spoon (helps sauce soak in), sprinkle with green onion (if using), and drizzle with soy sauce and sesame oil. Serve immediately—it cools fast.

Chef’s Notes
-
Why warm water? Cold water can cause the eggs to set unevenly. Warm (not hot) liquid blends more smoothly and reduces air bubbles.
-
No steamer? Use a deep pot with a heatproof trivet or inverted saucer at the bottom. Keep the water level below the bowl. Cover the pot tightly.
-
Avoid “honeycomb” texture: High heat or uncovered steaming causes steam droplets to fall and create holes. Always cover the bowl.