
Pumpkin Coconut Squares Recipe (南瓜椰香软糕)
-

RATINGS
Not rated yet
-

COOK TIME
Prep 15m • Cook 10m
-

VIEWS
595
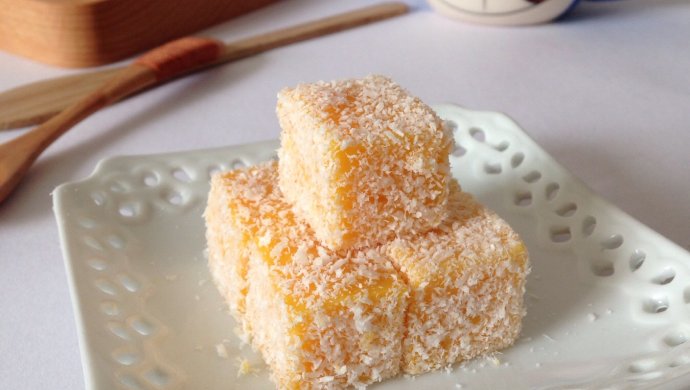
I first made this on a rainy October afternoon when I had half a sugar pumpkin left over from soup. Instead of adding loads of sugar, I leaned into the pumpkin’s natural sweetness—just a touch of maple syrup and a splash of oat milk to keep it dairy-free for my niece. The result? Soft, almost pudding-like squares with a whisper of coconut that don’t taste “healthy” at all—they just taste like comfort. My go-to trick: dip the knife in hot water before cutting. Clean slices every time.

Ingredients
-
200 g fresh pumpkin
about ½ small sugar pumpkin or kabocha
-
100 g unsweetened plant-based milk
oat, almond, or dairy milk all work
-
15 g pure maple syrup
or 1 tbsp, substitute with honey if not vegan
-
15 g cornstarch
or arrowroot starch for corn-free
-
25 g unsweetened shredded coconut
for coating; about 3 tbsp
-
Light oil or butter for greasing pan
optional, neutral oil like canola or coconut oil works

Instructions
-
Step 1: Steam and mash pumpkin until silky smooth
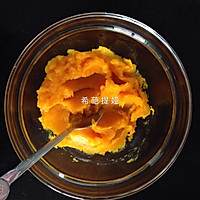
Peel and seed the pumpkin, cut into 2cm-thick chunks. Place in a steamer or steaming bowl, steam over high heat for 10-12 minutes (until a chopstick easily pierces the pumpkin). Put the steamed pumpkin chunks into a bowl, mash into a smooth, lump-free puree with a fork or spoon. Let cool to room temperature, then measure 120g for use (extra puree can be refrigerated for porridge, bread, etc.).
-
Step 2: Whisk wet and dry ingredients together cold
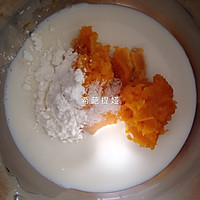
Prepare a small pot (non-stick pot is recommended to prevent burning). Add 120g pumpkin puree, 100g milk, 25g granulated sugar, and 15g cornstarch to the pot in order. Stir thoroughly with a whisk or spoon until all ingredients are well mixed and there are no cornstarch lumps (to avoid clumping during simmering).
-
Step 3: Cook over low heat, stirring constantly until thickened
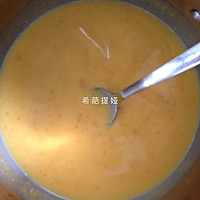
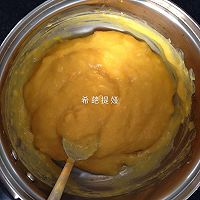
Place the pot over low heat, stir continuously with a whisk while heating (stir non-stop to prevent burning the bottom and cornstarch sediment). As it heats up, the mixture will gradually thicken. When obvious lines appear and you feel resistance while stirring (the mixture drops in lumps from the whisk and doesn’t fall apart), turn off the heat immediately.
-
Step 4: Pour into a greased or lined pan for easy removal
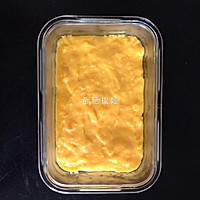
Take a rectangular container (about 15cm×10cm, or a food storage container). Lightly grease the inner wall with a thin layer of butter or vegetable oil (to prevent sticking and ease demolding), or line with plastic wrap (even easier to demold). Pour the cooked pumpkin milk mixture into the container, smooth the surface with a spatula, and gently tap the container a few times to release air bubbles inside.
-
Step 5: Chill until firm—overnight works best
Let the pumpkin milk mixture cool to room temperature, then cover the container with a lid or seal with plastic wrap. Place in the refrigerator’s chill compartment (around 4℃) and let sit for at least 2 hours (or refrigerate overnight for firmer texture and better setting).
-
Step 6: Cut with a hot knife and roll in coconut
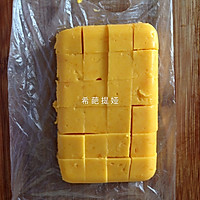
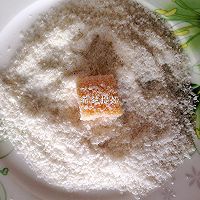
Remove the chilled pumpkin milk block from the refrigerator, invert the container or lift the plastic wrap, and take out the whole block onto a cutting board. Cut into 2cm×2cm small cubes with a knife (dip the knife in a little water before cutting to prevent sticking). Pour an appropriate amount of shredded coconut onto a plate, place the small cubes on the plate, and roll gently to coat the surface evenly with shredded coconut.
-
Step 7: Serve chilled and store properly
Transfer the coconut-coated pumpkin milk fudge to a plate and serve immediately. If not eating right away, store in a sealed container in the refrigerator and consume within 2 days for the best taste.

Chef’s Notes
-
Pumpkin selection tip: Choose pumpkin with high sweetness and moderate moisture (e.g., baby pumpkin, honey pumpkin) for sweeter puree—no need for extra sugar. Avoid pumpkin with too much moisture, which requires longer simmering to thicken the mixture.
-
Simmering key: Use low heat and stir non-stop—otherwise the bottom burns easily, affecting taste. Judging thickness is important: too thin won’t set after chilling, too thick becomes hard; the right consistency is “drops in lumps without falling apart”.
-
Flavor adjustment suggestions: For richer milk aroma, replace milk with heavy cream (or add 10g condensed milk); if you don’t like coconut, coat with milk powder, almond flakes, cocoa powder, or matcha powder instead; to add texture, add 10g chopped cranberries or raisins (soaked in advance) during simmering.