
Sunflower Seed & Sesame Brittle Recipe (葵花籽芝麻脆片)
-

RATINGS
Not rated yet
-

COOK TIME
Prep 10m • Cook 15m
-

VIEWS
669
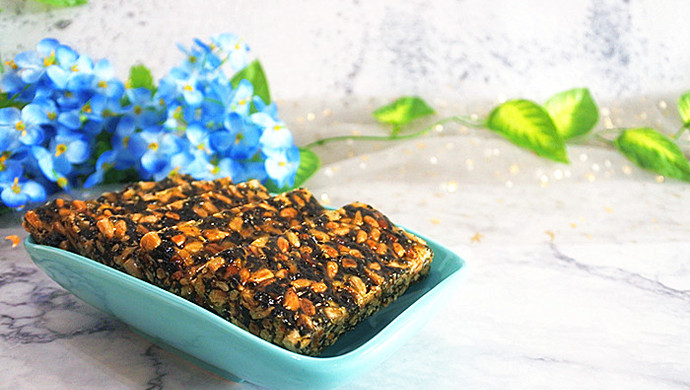
This brittle lives in the space between snack and treat—simple enough to make on a weeknight, special enough to wrap up as a gift. The base is just sugar, seeds, and a whisper of salt; no corn syrup, no artificial binders. I reduced the sugar to the point where it holds the seeds together without overwhelming them, so what comes through is the roasted depth of sesame and the mild, almost buttery note of sunflower kernels. It snaps cleanly when you break it, stays dry to the touch, and never turns sticky—even in a humid kitchen. Best with strong tea or black coffee, it’s the kind of thing you nibble slowly, not devour mindlessly.

Ingredients
-
200g raw sunflower seed kernels
unsalted
-
60g raw black sesame seeds
or substitute with white sesame seeds
-
300g granulated sugar
or 150g granulated sugar + 150g maltose for extra chewiness
-
5g butter
optional, for milk aroma and anti-sticking
-
a pinch of salt
optional, 1g, to balance sweetness and highlight nut aroma

Instructions
-
Step 1: Toast seeds separately
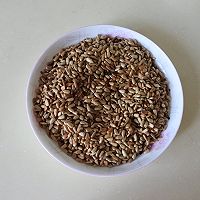
Prepare a non-stick pan (or regular iron pan). First, add 200g sunflower seed kernels, stir-fry over medium-low heat (stir constantly to avoid burning). Fry until the kernels turn slightly yellow and emit a clear aroma (about 5-6 minutes), turn off the heat, transfer to a plate, and let cool (to prevent over-roasting from residual heat). No need to wash the pan—add 60g black sesame seeds, continue stir-frying over medium-low heat for 2-3 minutes until the sesame seeds crackle and darken, turn off the heat, transfer to cool (black sesame burns easily, so monitor closely).
-
Step 2: Prep your work surface before sugar hits the pan
Take a silicone mat (or a baking tray lined with 2 layers of parchment paper). If using parchment paper, brush a thin layer of butter on the surface (to prevent sticking). Prepare a rolling pin for flattening the brittle later.
-
Step 3: Melt sugar slowly—no stirring after it dissolves
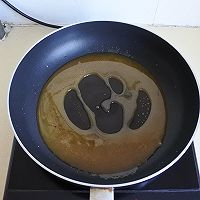
Wash and dry the same non-stick pan (or use a clean one). Add 300g granulated sugar (add maltose with sugar if using), and a little water (about 10g, to help sugar melt and prevent burning). Heat over medium-low heat, stir gently with a silicone spatula until the sugar is completely melted (avoid frequent stirring to prevent crystallization). Continue heating until the syrup turns amber (about 150℃—the syrup is thick and drips in a thin thread when the spatula is lifted). If adding butter and salt, put them in now, stir quickly until butter melts and salt dissolves.
-
Step 4: Fold in seeds off-heat to control temperature
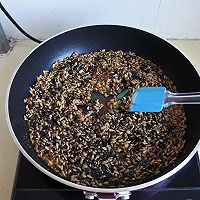
Add the cooled sunflower seeds and black sesame seeds to the hot syrup immediately. Using a silicone spatula, stir quickly and thoroughly until all the seeds are evenly coated and no dry bits remain—work swiftly, as the syrup will begin to set as it cools.
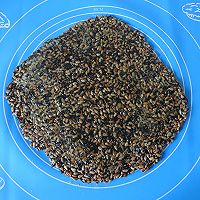
The photos show me shaping the brittle directly in the hot skillet—a habit from making this recipe many times. However, if you’re new to working with hot sugar, skip the pan entirely. Instead, pour the mixture onto the parchment-lined tray or silicone mat prepared in Step 2. This method is far more reliable for clean, consistent results. -
Step 5: Roll thin while hot—but protect your hands
Quickly pour the mixed nut-syrup mixture onto the prepared silicone mat or parchment paper. Use a rolling pin to roll it into an even thin sheet immediately (recommended thickness 0.5-1cm—too thick is hard to bite, too thin is easy to break). Wrap the rolling pin with a layer of parchment paper (to prevent sticking) while rolling, ensuring the surface is flat and the thickness is uniform.
-
Step 6: Cut while slightly warm—not hot, not cold
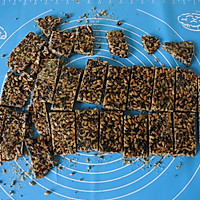
Let the nut brittle sheet sit at room temperature for 5-10 minutes until it’s slightly set but still flexible (easy to cut without breaking). Use a sharp knife to cut it into small pieces (shape as desired—rectangles, squares, or diamonds). Continue cooling in a well-ventilated area for 20 minutes until completely hard and crispy, then store in an airtight container.

Chef’s Notes
-
Key to roasting nuts: Roast sunflower seeds and sesame separately—they have different ripening speeds (sunflower seeds are larger and need more time; sesame is small and burns easily). Cool the nuts completely after roasting to prevent them from becoming “chewy” due to residual heat, which affects crispness.
-
Sugar syrup heat control: Use medium-low heat throughout—high heat causes the syrup to burn quickly (burnt syrup is bitter and inedible). To check if the syrup is ready, drop a little into cold water; if it solidifies into a hard, crispy piece immediately, it’s done.
-
Flavor adjustment suggestions: For richer texture, add 50g chopped almonds, walnuts, or cashews (roasted in advance). To reduce sweetness, decrease sugar by 50g and add 1g salt to highlight nut aroma. For milk flavor, add 10g condensed milk when simmering the syrup. Vegetarians can replace butter with coconut oil for a coconut aroma.
-
Anti-sticking and storage tips: If no silicone mat, use 2 layers of parchment paper and brush with thin oil to prevent sticking. Store the brittle in an airtight jar in a cool, dry place to avoid moisture (if it softens, bake in the oven at 150℃ for 3-5 minutes to restore crispness).