
Crispy Sichuan-Style Cauliflower with Crispy Pork
-

RATINGS
Not rated yet
-

COOK TIME
Prep 12m • Cook 10m
-

VIEWS
513

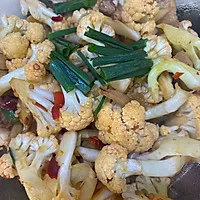
This crispy Sichuan-style cauliflower with savory pork is a restaurant-favorite I’ve made at home for years—quick to prep, deeply flavorful without being overly spicy, and perfect for weeknights when you want bold taste without complicated steps. It’s the kind of dish that holds up well in a wok or large skillet, delivers crunch from lightly charred florets, and gets rich umami depth from fermented豆瓣酱 (spicy broad bean paste) and caramelized pork fat. If you're searching for 'how to cook cauliflower like a Chinese restaurant' or 'easy cauliflower stir fry with pork', this version skips the guesswork—every ingredient is measured, every step timed, and no special equipment needed beyond a sturdy pan.

Ingredients
-
cauliflower
1/2 medium head (about 12 oz / 340 g), cut into 1-inch florets
-
pork belly
3.5 oz (100 g), sliced 1/8-inch thick across the grain
-
granulated sugar
1/2 tsp
-
toasted sesame oil
1/2 tsp
-
garlic
3 cloves, minced (about 1 tbsp)
-
fresh ginger
1 tsp, peeled and finely grated
-
dried red chilies
4–5 whole (mild heat) or 6–7 (medium heat), stems removed
Can’t find it? Try this one. -
vegetable oil
2 tbsp

Instructions
-
Step 1:
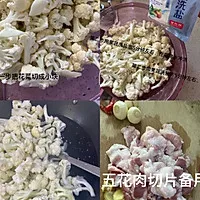
Break the cauliflower into even 1-inch florets—no need to soak, but give them a quick rinse and pat dry thoroughly. Slice the pork belly into thin strips. Mince the garlic and grate the ginger. Keep dried chilies whole unless you prefer more heat—then lightly crush them with the side of your knife.
-
Step 2:
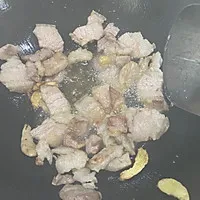
Heat 1 tbsp oil in a 12-inch skillet or wok over medium heat. Add pork belly in a single layer and cook without stirring for 2 minutes until edges start to curl and brown. Flip and cook another 1½–2 minutes until golden and some fat has melted out. Transfer pork to a small bowl, leaving oil and rendered fat in the pan.
-
Step 3:
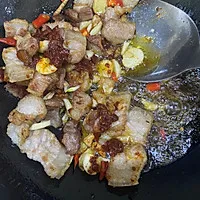
Add remaining 1 tbsp oil to the pan. Toss in dried chilies, garlic, and ginger. Stir constantly for 30 seconds until fragrant—don’t let garlic brown. Push mixture to one side, add doubanjiang, and stir-fry in its own spot for 45 seconds until oil turns reddish and smells deep and earthy.
-
Step 4:
Return pork to the pan. Add oyster sauce, soy sauce, and sugar. Stir well and cook 1 minute until glossy and slightly thickened. The mixture should sizzle gently—not steam or bubble violently.
-
Step 5:
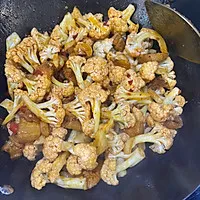
Add cauliflower florets in an even layer. Let sit undisturbed for 90 seconds to get light sear marks, then toss with tongs. Cook 4–5 minutes total, tossing every 60–90 seconds, until florets are tender-crisp and edges are lightly charred. If pan looks dry, splash in 1 tsp water—but only if needed.
-
Step 6:
Drizzle with sesame oil, toss once more, and remove from heat immediately. Serve warm in a shallow bowl—no garnish needed, though a few scallion slices work if you have them.

Chef’s Notes
-
Dry cauliflower well before cooking—it gets crispier and more fragrant.
-
Render fat from pork belly first; that’s where the real flavor comes from.
-
Fry doubanjiang alone until red oil appears—this unlocks its full aroma.
-
Let cauliflower sear undisturbed for 90 seconds for that classic wok char.
-
Add sesame oil off heat for the best fragrance.